Help_Guide.gif (20661 bytes)

Configuring Outlook Express


Images Will Take A Few Moments To Load!


1.) Double click the Outlook Express icon on your desktop.

2.) If a Connection Wizard or a Connect To Window appear, cancel it.

3.) Click on the Tool Menu (at the top of the Outlook Express window),
and select Accounts (see example below).


4.) Click on the Mail Tab on the main window.

5.) If you have a existing account listed in the window, highlight it with a single
left mouse click
, then click the Remove button. When a window appears asking
you if you want to remove the account, click Yes.

6.) Next, click the Add button, then select Mail (see example below).


7.) In the next window, enter in your real name, then click on the Next button
(example below).


8.) Next, enter in your e-mail address (lowercase), then click on the Next button
(example below).


9.) In the next window, enter in the following (see example below):

  • Select POP3 for Incoming Mail Server.

  • Enter mail.cvc.net for your POP3 Server.

  • Enter mail.cvc.net for your SMPT Server.

Click on the Next button (on the bottom of the window).


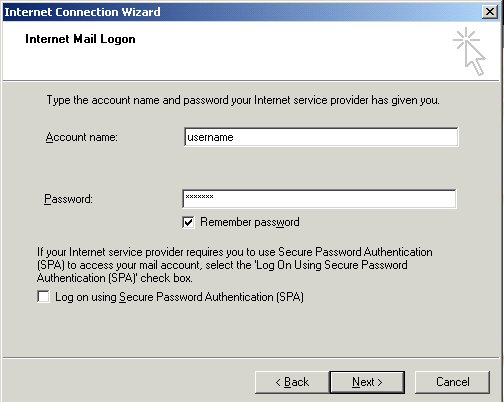
10.) In the next screen, Internet Mail Logon, complete the following:

  • POP account name: enter your CVC Internet user name in lowercase characters
    and Do Not enter @cvc.net).

  • Password: enter your CVC Internet password in lowercase characters.

  •   Do Not select Log On Using Secure Password Authentication.

Click on the Next button (at the bottom of the screen).

(sample screen below)

Internet Mail Logon 


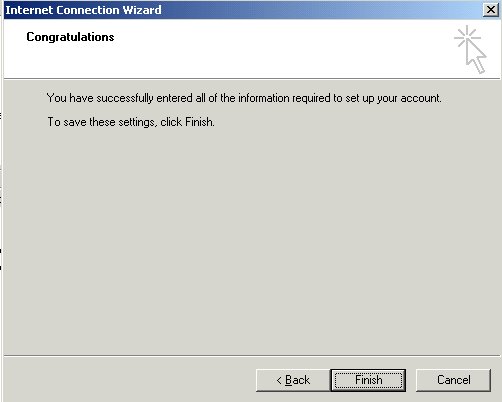
11.) In the next window, click on the Finish button

Congratulations! Email is now setup!

Your done! For information on using e-mail or browsing the Internet, refer to the Help Menu 
located within the software program.


To verify that your e-mail settings are properly set, please complete the following steps.


1. Open Outlook Express (you do not need to connect to the Internet - click "Work Offline" if your Connect To window appears).  At the top of the Outlook Express window, click on the "Tools" menu and select "Accounts".

Outlook Express Mail Settings, Step 1


2. At the top of the Internet Accounts screen, click on the "Mail" tab.  Click once on the mail account so it becomes highlighted, then click on the "Properties" button (right side of the screen, third button down).

Outlook Express Mail Settings, Step 2


3. In the Properties window, "General" screen, verify the following settings:

  • Mail Account - Should contain the mail server addressing for your e-mail account (example shown below).

  • Name - Should contain your real name or business name.

  • Organization - Optional Setting, this field can contain your organization's name.

  • E-mail Address - Make sure the correct e-mail address is showing (example shown below).

  • Reply Address - Optional Setting, this field can contain your e-mail address, but make sure the address is correct.

  • Include this account when receiving mail or synchronizing - This setting should be selected (check marked).

Outlook Express Mail Settings, Step 3


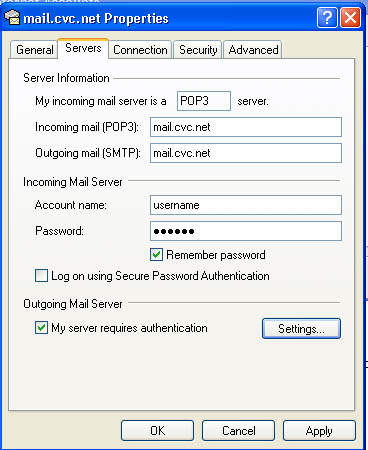
4. At the top of the Properties window, click on the "Servers" tab and verify the following settings:

  • My Incoming mail server is a: POP3 sever should be showing.

  • Incoming Mail (POP3): This setting should contain the mail server addressing assigned to your e-mail account (example shown below).

  • Outgoing Mail (POP3): This setting should contain the mail server addressing assigned to your e-mail account (example shown below).

  • Incoming Mail Server, Account Name: This should contain your mailbox username.

  • Incoming Mail Server, Password: This should contain your mailbox password.

  • Log on using Secure Password Authentication: Should not be selected.

  • Outgoing Mail Server, My Server Requires Authentication: This option should be selected.


5.) At the top of the Properties window, click on the "Connection" tab.  In the Connection screen, make sure "Always connect to this account" using is selected and that "CVC Internet" is showing in the white field below.

Connection Window - Always Connect Using CVC Internet


6. At the top of the Properties window, click on the "Security" tab.  In the Security screen, the only option that should be active, is the "Algorithm (3DES)".

Mail Security Settings


7.  At the top of the Properties window, click on the "Advanced" tab.  In the Advanced screen,
verify the following options:

  • In the "Server Port Numbers" section, "Outgoing mail (SMTP)" field, setting should be: 25

  • The option "This server requires a secure connection (SSL)": Do Not select this option 

  • In the "Incoming mail (POP3)" field, the setting should be: 110

  • The option "This server requires a secure connection (SSL)": Do Not select this option

In the section "Server Timeouts", move the arrow to: Long 5 minutes

In the section "Sending", Do Not select the option "Break apart messages larger than".

In the section "Delivery", Do Not select the option "Leave a copy of messages on server". 

Mail Properties Advanced -  Make sure to unmark "Leave Copy On Server"


8. At the bottom of the Properties window, click on the "Apply" button, then click on the "OK" button


9. In the "Internet Accounts" window, click on the "Close" button


10. In the "Outlook Express" main window, click on the "File" menu (located at the top of the Outlook Express window) and select "Close"


You're Finished!  For more information on using e-mail or browsing the Internet, please refer to the "Help" menu located within the e-mail software program.


Internet Explorer's Cache

To keep Internet Explorer running at it's best, make sure to periodically clean the cache. The cache stores graphics of sites you browse on the Internet, so the next time you revisit the site it will load the page much faster. But after extensive browsing the cache will become plugged, causing problems with browsing.


Cleaning The Cache - 

1.) Click Tools in the top left corner of Internet Explorer, select Internet Options.

2.) Click on Delete Files, another window will appear stating "All Temporary Files Will Be Deleted", click OK to continue. 

3.) When the hour glass disappears, click OK again to return to Internet Explorer.


Microsoft Products
 - Software Technical Information - 

FAQ’s Online Database 
 http://support.microsoft.com/directory/

Phone:
1-425-635-7222 (Windows 98/2000) 

Phone: 
1-425-635-7123 (Internet Explorer)

Phone:  
1-425-637-9308 (Microsoft Programs)


<<<<< BACK TO CVC INTERNET'S HELP GUIDE

Copyright © 1996-2008, CVC Internet, LLC.  All rights reserved. 
Certain names, logos, designs, titles, words or phrases on this site may
constitute trademarks, service marks or trade names of CVC Internet, LLC.,
or other entities which may be registered in certain jurisdictions.

This web site contains links to other Internet sites, and such links are not
endorsements of any products or services of such sites, and no information

in such Internet sites has been endorsed or approved by CVC Internet, LLC.

CVC Internet, LLC disclaims any responsibility, if some web site you link
to has material on it that offends you in any way.  If problems or
questions arise with the use of any of the linked web sites, please
contact the company that owns or operates the Internet site.