
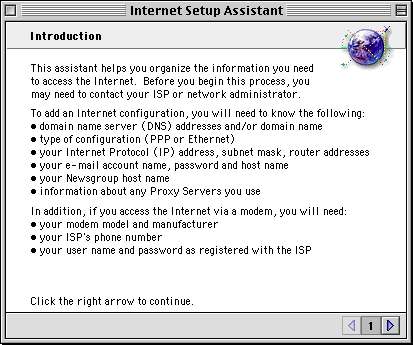
The Internet Setup Assistant is a application that helps you setup your Macintosh to dialup to the Internet. Each "Setup" screen will indicate the setting that is needed, for the correct CVC settings please follow each step shown below.
Click the Yes button to continue.
Click the Yes button to continue.

When done reviewing the information, click the
Next Arrow ![]() .
.
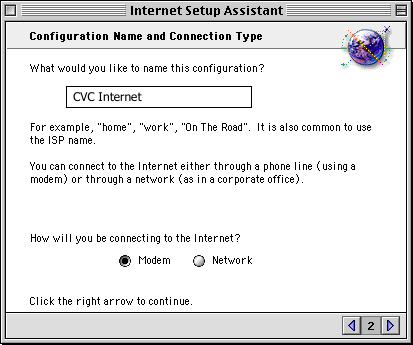
In this field, type in the name that you want to save the settings under - example: CVC Internet .
Select Modem (click on the bullet beside the setting to make this setting active).
When done, click the Next Arrow
![]()
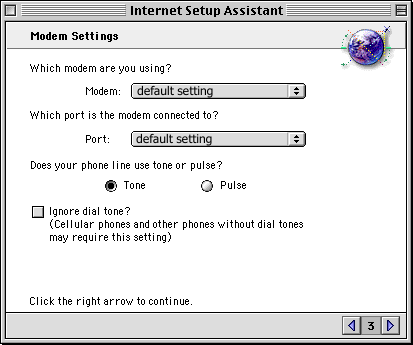
In the Modem field, select the type of Modem that your system has then continue to the next setting.
Which port is the modem connected to?
In the Port field, select the type of Port that you are using then continue to the next setting.
Does your phone line use tone or pulse?
Select Tone, then continue.
Ignore dial tone?
Leave this setting unchecked (this allows the modem to see if there is a dial tone on the phone line, if there is someone or something using the phone line then the modem will not dial).
When done, click the Next Arrow ![]() .
.
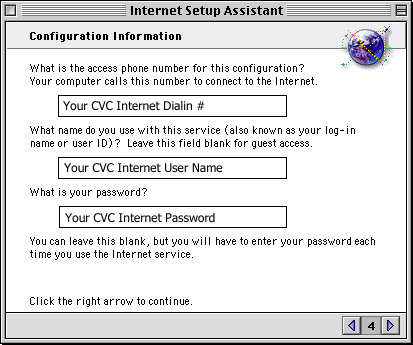
In this field, type in: Your CVC Internet dialin phone number.
Type in your CVC Internet username (please do not enter your real name or e-mail address, and make sure to enter the name in the character case assigned to your account - such as all lowercase).
Type in your CVC Internet password (make sure the password is entered in the character case assigned to your account - such as all lowercase). After it is entered, it should turn to bullets (••••••••) marking each character entered.
When done, click the Next Arrow ![]() .
.
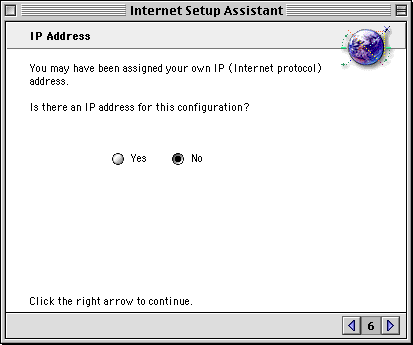
Select No, then click the Next Arrow
![]() .
.
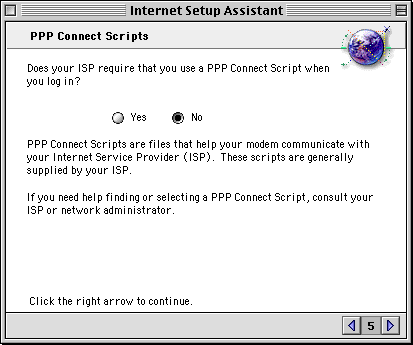
Select No, then click the Next Arrow ![]() .
.
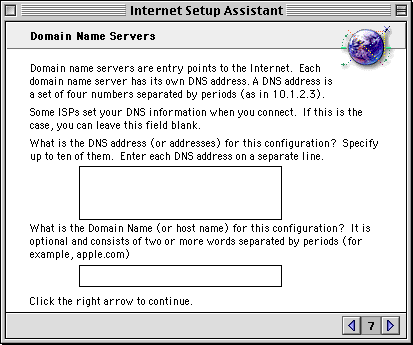
In earlier Mac Operating Systems, you would need to fill in this information, but with Mac OS 8.5 and above, you don't need to. So you can just leave these blank.
Please Note: If you have had problems getting connected before, then you can try setting this by entering in the numbers:
206.55.168.3
205.238.26.97
What is the Domain Name (or host name) for this configuration?
Leave this field blank.
When done, click the Next Arrow ![]() .
.
In the E-mail Address field, enter your CVC Internet e-mail address which is your CVC Internet username with the @cvc.net added to the end of it (example: username@cvc.net). Please make sure to enter the address in the correct character case assigned to your account - such as all lowercase.
In the Password field, enter your CVC Internet password in the correct character case assigned for account - such as all lowercase.
When done, click the Next Arrow ![]() .
.

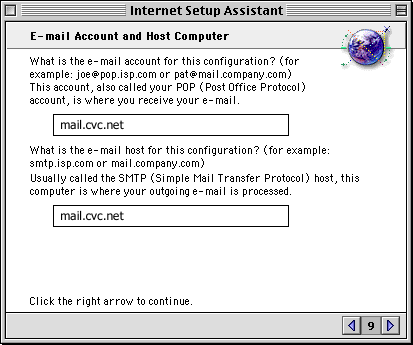
In this field, type in lowercase, no spaces: mail.cvc.net
What is the e-mail host for this configuration?
In this field, type in lowercase, no spaces: mail.cvc.net
When done, click the Next Arrow ![]() .
.
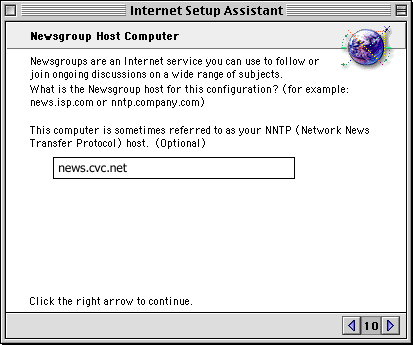
In this field, enter in lowercase, no spaces: news.cvc.net
Click the Next Arrow ![]() when done.
when done.
Click No for this step. When done, click the
Next Arrow ![]() .
.

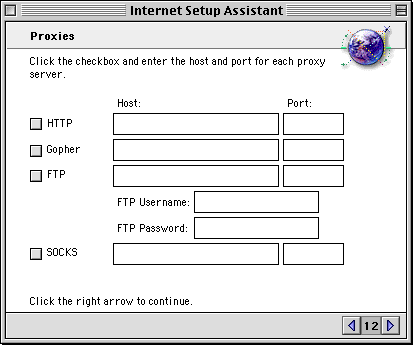
In this setup screen, do not
select or enter any information, just click the Next Arrow ![]() .
.
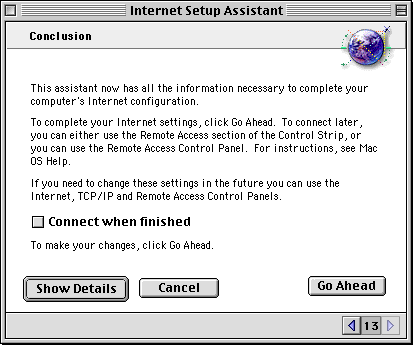
You are almost finished. Click on the Show Details button to check the summary of your settings. Go to step 16 to see the details.
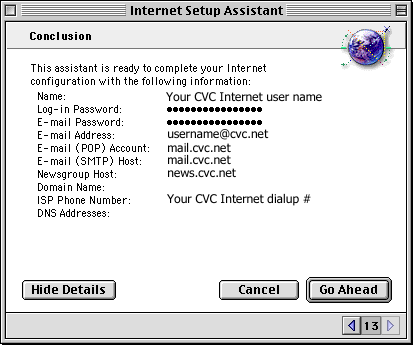
Here you will see a summary of everything you have entered. You may check everything, except passwords, since they are represented by the bullets (••••••••). When done, click Go Ahead to save these settings.
Your computer is now setup to use CVC Internet.
There should be two icons on your desktop, ![]() and
and ![]() . If you double-click on either of these icons, your Internet Browser or E-Mail program (specified in the
Internet control panel) should open, your Modem should dial, and the screeching tones you'll hear should get you
connected to the Internet. Once your online, you are ready to
browse the Internet or use your mail program. Happy Surfing!
. If you double-click on either of these icons, your Internet Browser or E-Mail program (specified in the
Internet control panel) should open, your Modem should dial, and the screeching tones you'll hear should get you
connected to the Internet. Once your online, you are ready to
browse the Internet or use your mail program. Happy Surfing!
< BACK TO CVC INTERNET'S HELP GUIDE
Copyright © 1996-2008, CVC Internet, LLC. All rights reserved.